Made from scrap

Made from scrap
All's well

Followers

Total Pageviews

Showing posts with label Free Crochet Pattern. Show all posts

Tuesday, 3 April 2012

"Two Hour Crochet Cowl'

Baba by Adriafil - Bulky/12ply 100% Merino

I had plans for this yarn as soon as I saw it.  It was a Destash on Ravelry and I managed to buy it for 20% of its cost.  I have just the hook to cope with bulky yarn.
Mr 25mm Beasty Bad Boy Hook!

Projects work up very quickly with this hook.  I chained 55 stitches, then did a row of double crochet, starting in the second stitch from the hook.  I used a chain to turn then worked crochet rib for eleven rows.  Sewed in the ends, attached three buttons (from my tin of old buttons) and Bob's your Uncle, I had a soft, warm, Merino cowl in well under two hours.  It has gone chilly again and some parts of the UK have had snow.  Widespread snow has been forecast.  Bring it on. . . I'm a ready for ya!


Monday, 26 March 2012

Crochet 'Granny Chic' Chicken - Free Pattern


There is only one thing better than a crochet chicken and that is more crochet chickens.  These are great fun to make for Easter.  

Crochet 'Granny Chic' Chicken


Materials: Scraps of Double knit Yarn in the colours you require for your chicken.  I chose red and brown.
Hook Size:  4mm
6mm Pair Safety Eyes
Abbreviations: UK Terminology
Chain - ch
Double Crochet – dc
Treble Crochet – tr
Treble Cluster – tr cl
Sl – slip stitch


Instructions:
For The Body:
Make 6 CH.  Join in a loop and work CH. 2TR, 1 CH, ‘3TR 1CH’ four times into the loop.   Join the round with a SL ST
Round 2:   Continue for the second round working 3CH 2TR into the CH space below the 3CH, 1CH, TR CL into the CH spaces of the previous round.   (You should have five clusters in total this round).  Join the round with a SL ST
Round 3: As Row 2   
Round 4:  3CH 2TR into the space directly below the three CH 1CH 3TR (2 TR CL in the same space), 1ch 3TR into the next CH space twice, 1CH 3TR 1CH 3TR into the next CH Space.   Join the round with a SL ST.  Fasten off.
For The Head And Beak:

Make two the same:
Make 2 CH, work 8DC into the 2nd CH from the hook.  Join the round with a SL ST.
Round 2:  3CH, work 1TR into each DC, do not join the round and join in red yarn for the beak.  Work 2TR into the same DC as the last ‘brown’ TR.  Fasten off.

For the Tail and the Wings:

The tail and the wings are worked the same.  The tail is worked into the TR stitches of the 3rd TR CL on the 2nd Round of the body.   The wings are worked into the TR stitches of the 3rd and 5th TR CL on Round 1 of the body.
Work as follows:
Into the first TR work 1DC and 1TR, into the 2nd TR work 3TR, into the 3rd TR work 1 TR and 1DC.
Making Up:
Sew in the ends on the body, tail and wings.  Place an eye in the centre of each half of the head.  Pad out the head by stuffing in the ends, align the head and beak and stitch the two halves together.  Sew the head onto the top of the body.
For the Comb:
Using red Yarn for the comb:  Join yarn into the 3rd TR from the beak.  CH3, 2TR, 1DC, work 3TR and 1DC into the 4th TR from the beak, work 3TR and 1 DC into the 5th TR form the Beak.  Fasten off and sew in the ends.

Thursday, 8 March 2012

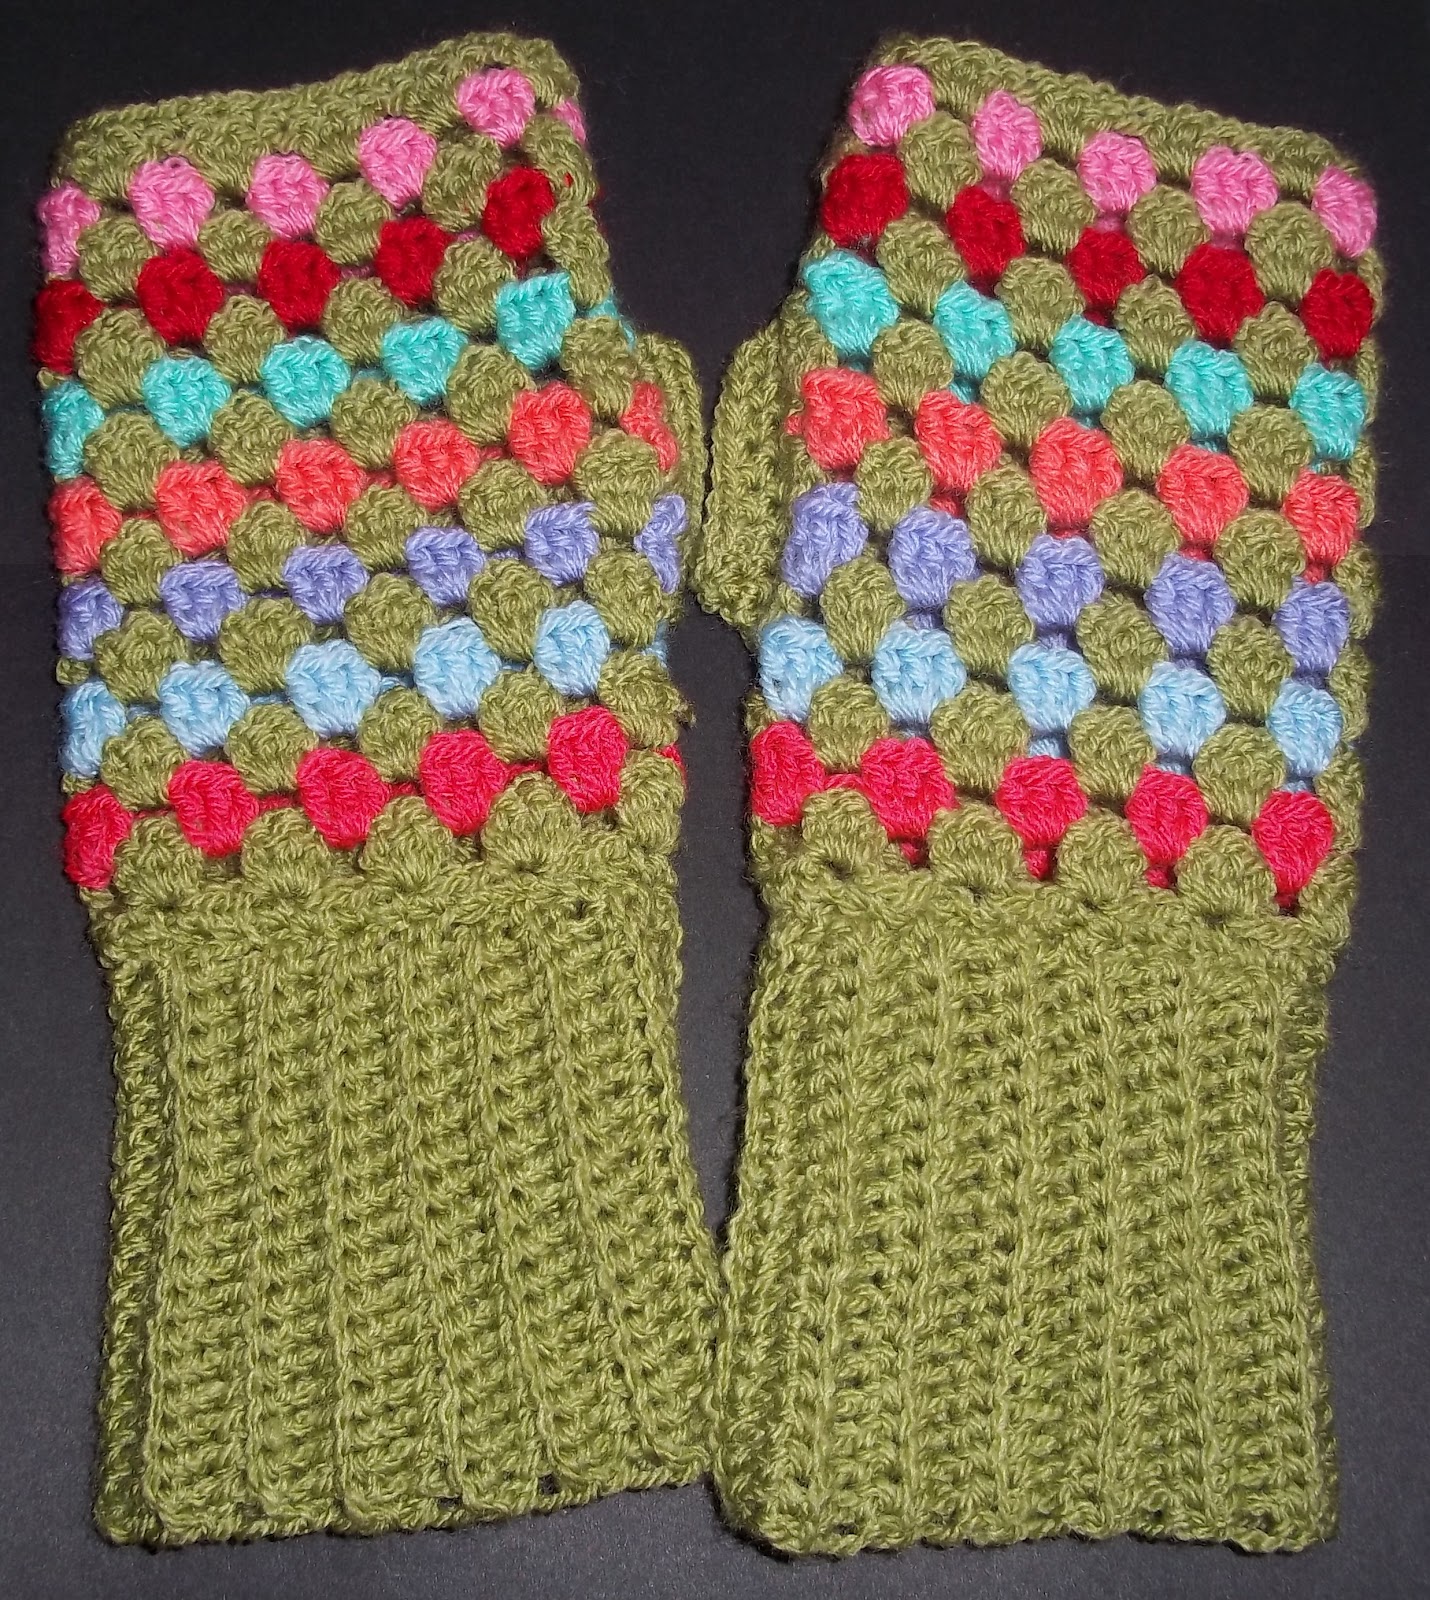
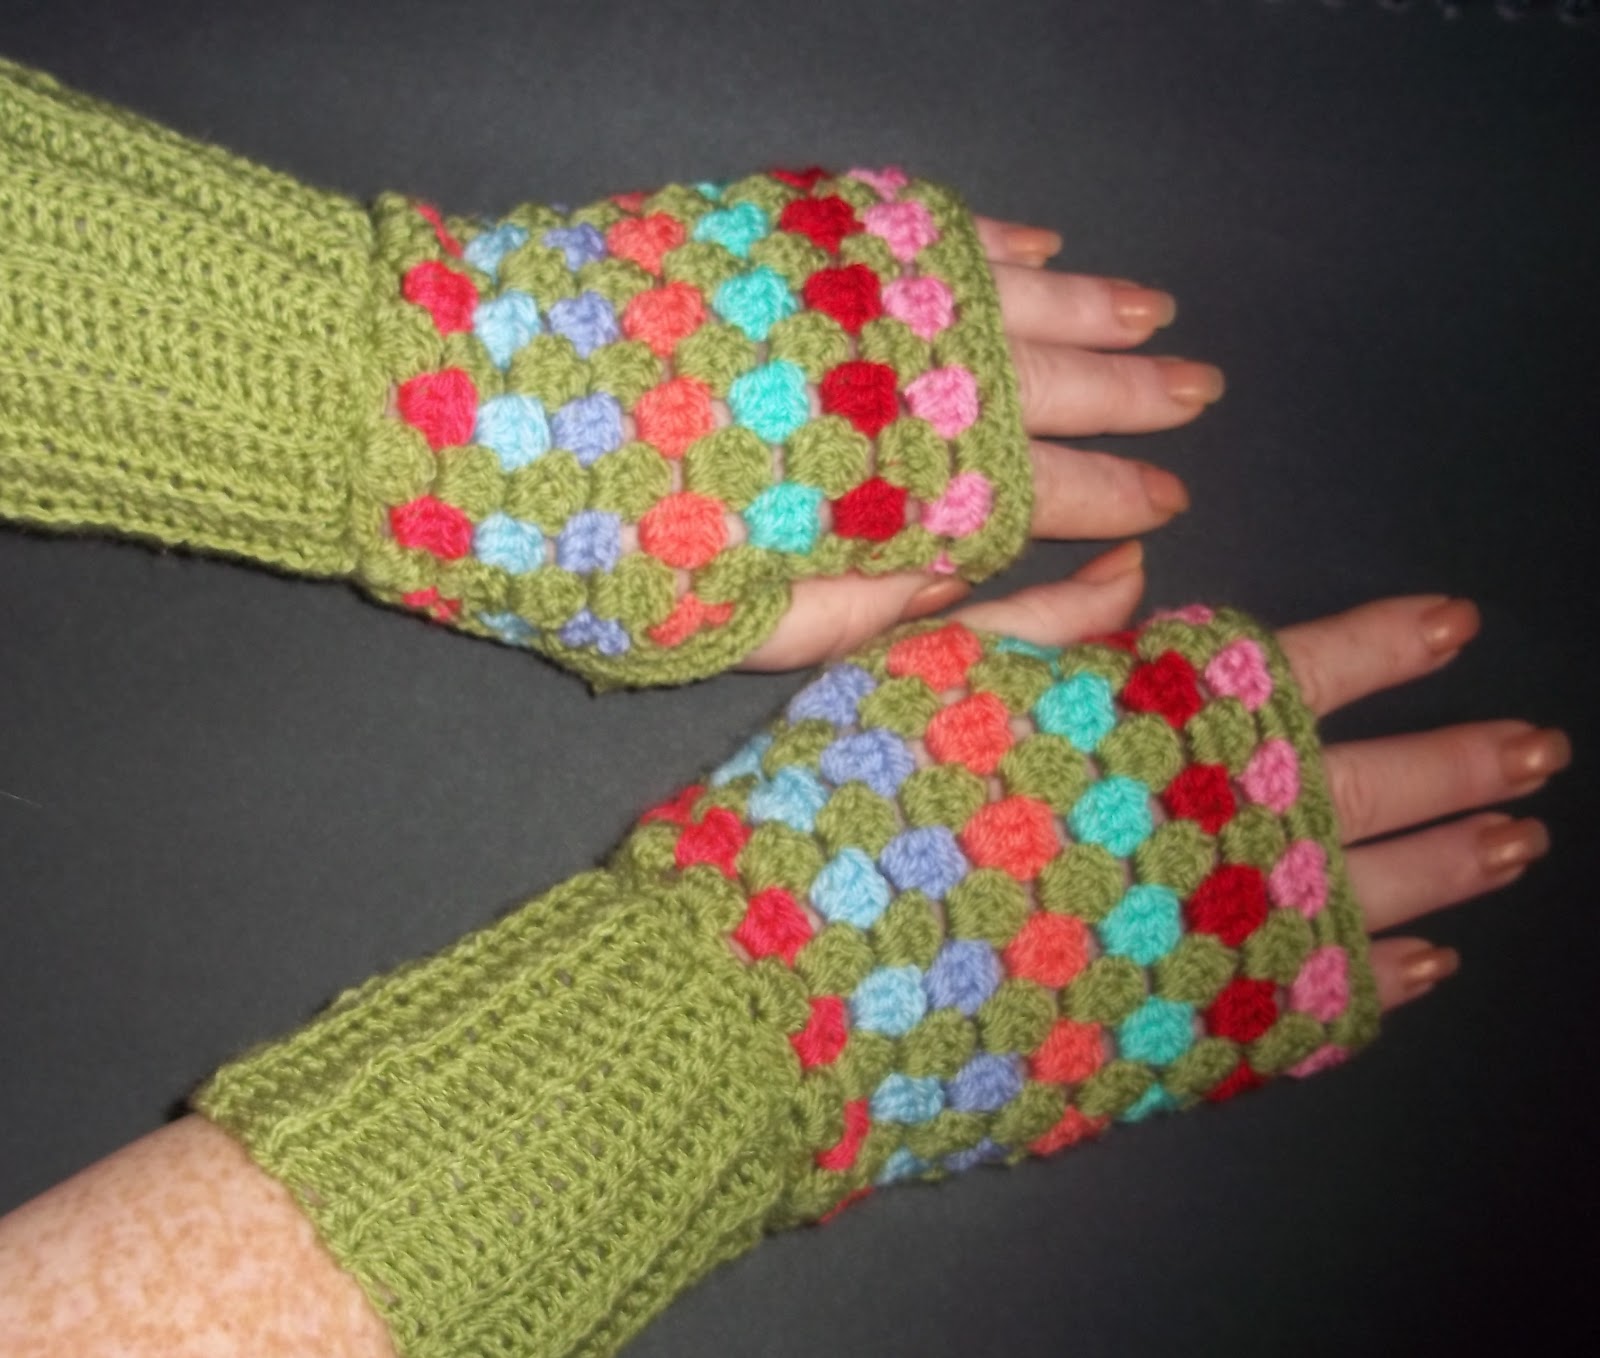
Granny Chic 'Granny Stripe' Wrist Warmers Pattern

Delusions of Grandeur have passed.  I am very grateful to the Oompa Loompas who helped me with testing this pattern.  I think it is safe to say they were happy with their end results and the feedback I received for the pattern was very useful.  Aren't people kind?  Thanks again to those of you who helped and those of you who volunteered your time and services.  I don't deserve ya!
          I have enjoyed wearing these 'Wrist Warmers' but then I am a sucker for 'Granny Stripe'.  They look better on than off, but my photography skills are not great and my teenager lost patience with me doing an 'on location artistic photo shoot'.  I don't mind being a 'hand model' he hated being a photographer, he was wearing my shoes in the back garden, cursing me to hurry up and stop fussing about.  So the shoot was over and done with before it started.  Euan on the other hand took about twenty photographs of me wearing the Chicken Tea Cosy as a hat, I had to snatch the camera from him.  Hmmm my boys 'Chalk and Cheese'.

These Granny Chic 'Granny Stripe' Wrist Warmers are a very quick and easy make.  I would love to hear from you if you decide to give them a go.  XXX
        
Well on with the pattern:

Materials: Scraps of Double knit Yarn.  1 main colour and 7 contrast colours
Hook Size:  4.5mm
Abbreviations: UK Terminology
Chain - ch
Double Crochet – dc
Treble Crochet – tr

Instructions:
For the Granny Stripe section of the Wrist Warmers:  Working in the main colour.
Make 31 chain.  Turn.
Row 1:   Miss the first stitch work a double crochet into each the chain.
Row 2:    Ch 3 and turn.   Work 2 tr into the 1st dc.  (Miss the next two dc, 3tr into the next dc) Repeat 8 times.  Miss 2dc and work 1 tr into the last stitch.   
Row 3Join contrast colour.  Ch 3,  make 3 tr into the next and each tr cluster space along the row.  Work 1 tr into the last tr of the previous row to end the row. 
Row 4Re-join Main colour.  (Repeat Row 2 and 3, 6 times). 
Row 16:  Using the main colour repeat row two.
Row 17:  1 ch, work 1 dc in each of the previous row’s tr, fasten off.
To Make The Cuffs:
Using the main colour, ch 18.
Row 1: 1 dc into each ch.
Row 2:  1 ch, 1 dc through the back of dc, to the end of the row.  Repeat this row 25 times to form crochet rib.  Fasten off.
Make Two.
To Make up: Both Wrist Warmers the Same.
Sew in all ends.   With the wrong side facing:  Sew the cuff onto the wrist warmer.
Sew securely but loosely.  Slightly stretch the rib of the cuff to attach it evenly.
Sew up the side seam to the top edge of the second contrast colour stripe.  Fasten off.
Rejoin at the top of the 5th contrast colour stripe, this creates the thumb space.  Continue
to sew up the side seam and fasten off.
To make the thumbs:
Using the Main colour pick up and work evenly 18 dc around the thumb space (9dc each side).  Working in a round work 2 rows of dc and fasten off.  Sew in the end.

NB:  These make a slim fitting ladies wrist warmer.  The size can be easily altered to make larger or smaller wrist warmers.  Measure the width and length to the required size and alter stitches and rows accordingly.   
For the Granny Stripe, ch multiples of 3 for the required size. 
For the cuff chain the required length and work the number of rows required to achieve a snug fit.

This Picture is the best of a bad deal!


Sunday, 19 February 2012

Purple Haze 'Mini Granny Square Scarf' - 'Tah Dah'

Yeah!  Finally, 'Purple Haze' Scarf 'Tah Dah'!  
I had a willing model to demonstrate the versatility of the scarf and to demonstrate some of the ways it can be worn.  I was going to model myself but the photographer repeatedly managed to take shots of me looking exasperated and he did not manage to capture my natural radiance and beauty!
He found it some what incredulous I wanted to take more than one photograph.
By style three we were getting a rather forced smile, well it could be termed more of a grimace really!
This was the final shot of the photo shoot and it is clear the model has that far away look and has drifted off.  Nice pose though.  I like the Italian Widow look, this scarf is long enough to keep my head, ears and neck warm.
78 Mini Granny Squares of Purpleness.   468 ends to sew in of Purpleness!  I have worked on it in the car, on a train, in waiting rooms...what am I going to do without all this purpleness in my life...certainly not a bed spread.  (Ah I know I have a little bit of Alpaca to spin!)  The journey all started here 'Purple Haze Crochet Craze'  in Glastonbury High Street with a chance viewing of an 'On Sale' scarf in a shop window.
I can't tell you how many times I thought 'Why didn't I just buy that scarf?'
Should you wish to replicate my experience the instructions are here:


‘Purple Haze’  Mini Granny Square Scarf
Materials:  Double Knit (worsted weight) Yarn in colours of your own choice
Hook Size:  4.5mm

Abbreviations: (UK Crochet terminology) 
Chain - ch
Double Crochet – dc
Treble Crochet – tr
Single Crochet – sc


Instructions:
For the Mini Granny Squares:  Make 78
For the first round:  Make 6 chain.  Join with a slip stitch.  Ch3, tr2, ch1, tr3, ch1, tr3, ch1 tr3, join the round with a slip stitch and change colour. 
For the second round:  Chain 3, Tr 2,   (Tr3 into the corner space, ch1 tr3).   Repeat twice.  Tr3 into the final corner and join the round with a ss.  Change yarn colour.
Third round:   Chain 3, Tr 2, tr 3 into the ch space of the previous round.  (Tr3 into the corner space, ch1 tr3).   Repeat twice.  Tr3 into the final corner and join the round with a ss.  Fasten off.  Sew in the ends.
To make up:  Sew the squares together into 23 rows of three.
Work two rows of dc around the entire scarf to make a border.  
Apply Fringe:  I used nine tassels along each end. 
(I used a steam iron to block the scarf but as it is acrylic I did not touch the fabric with the iron, I used a steam setting and steamed the scarf about 1cm from the fabric, pulling and stretching it into shape as I did so).